Tools and Materials Required: Remove Bathroom Faucet Handle
Remove bathroom faucet handle – Removing a bathroom faucet handle requires a few essential tools. The specific tools needed will vary depending on the design of the handle, but some common items include:
- Adjustable wrench: An adjustable wrench is a versatile tool that can be used to loosen or tighten a variety of nuts and bolts. It is a good choice for removing faucet handles that are held in place by a single nut.
- Allen wrench: An Allen wrench is a small, L-shaped tool that is used to tighten or loosen screws with a hexagonal head. Allen wrenches are often used to remove faucet handles that are held in place by screws.
- Pliers: Pliers can be used to grip and turn nuts and bolts that are too small for an adjustable wrench. They can also be used to remove faucet handles that are stuck.
- Penetrating oil or lubricant: Penetrating oil or lubricant can be used to loosen stuck faucet handles. It is applied to the threads of the nut or screw that is holding the handle in place, and it helps to break down the corrosion that may be preventing the handle from being removed.
Types of Wrenches or Pliers
The type of wrench or pliers that you need will depend on the design of the faucet handle. Some handles are held in place by a single nut, while others are held in place by two or more screws. If the handle is held in place by a nut, you can use an adjustable wrench to loosen it. If the handle is held in place by screws, you will need to use an Allen wrench or a pair of pliers.
Removing a bathroom faucet handle can be a simple task, but it’s essential to approach it with care. If you’re looking for a sleek and modern upgrade, consider a matte black bathroom faucet single hole. Matte black bathroom faucets add a touch of sophistication to any bathroom, and their single-hole design makes installation a breeze.
Once you’ve removed the old handle, installing the new one is straightforward, ensuring a quick and seamless update to your bathroom.
Use of Penetrating Oil or Lubricant
If the faucet handle is stuck, you can try using penetrating oil or lubricant to loosen it. Apply the penetrating oil or lubricant to the threads of the nut or screw that is holding the handle in place, and let it sit for a few minutes. The penetrating oil or lubricant will help to break down the corrosion that may be preventing the handle from being removed.
Removing a bathroom faucet handle can be a simple task, especially if you have the right tools. For instance, the Moen Genta Single Hole Single Handle Bathroom Faucet is designed to make the process effortless. With its easy-to-follow instructions and durable construction, you can quickly replace your old faucet handle without any hassle.
Step-by-Step Removal Process

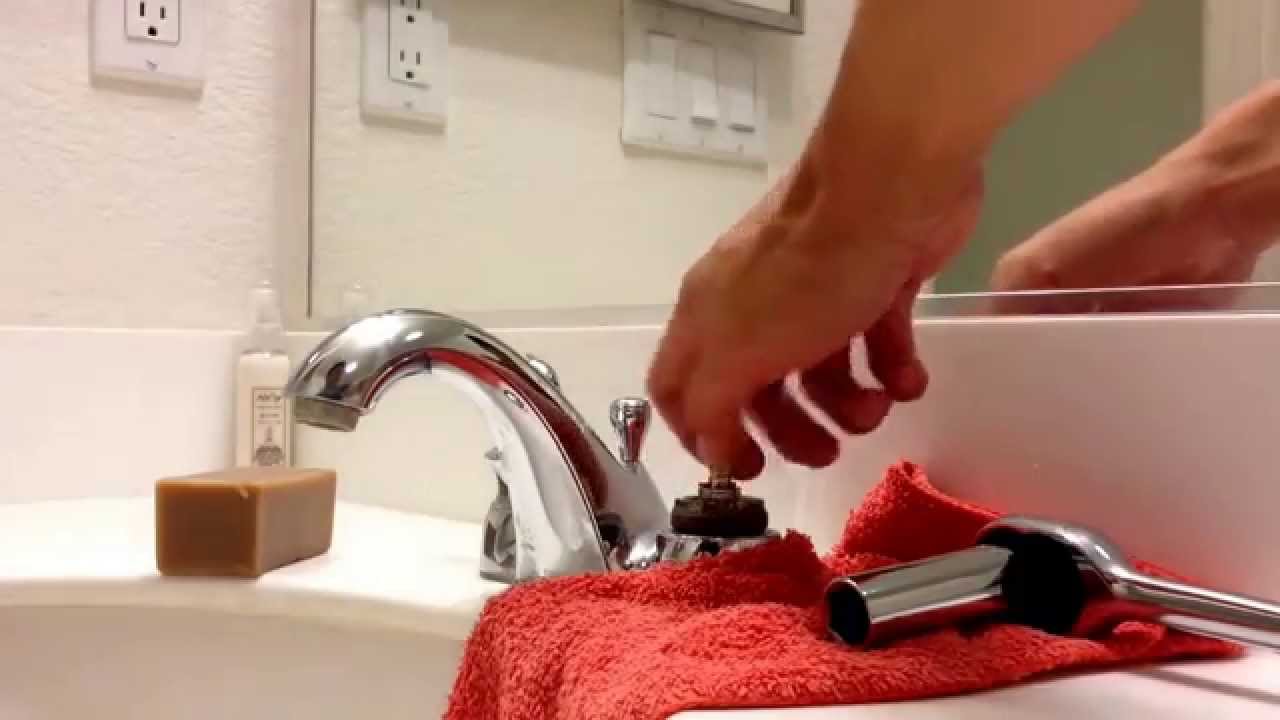
Removing a bathroom faucet handle is a simple task that can be completed in a few minutes with the right tools. The first step is to identify and locate the set screw or retaining nut that holds the handle in place. This is typically located on the underside of the handle, near the base. Once you have located the screw or nut, use the appropriate tool to loosen and remove it.
Removing the Set Screw
If the handle is held in place by a set screw, you will need to use a hex key or Allen wrench to loosen it. Insert the key into the screw and turn it counterclockwise until the screw is loose enough to remove by hand. Once the screw is removed, you should be able to pull the handle straight off of the faucet.
Removing the Retaining Nut, Remove bathroom faucet handle
If the handle is held in place by a retaining nut, you will need to use a wrench to loosen it. Place the wrench over the nut and turn it counterclockwise until it is loose enough to remove by hand. Once the nut is removed, you should be able to pull the handle straight off of the faucet.
Once the handle is removed, you can access the cartridge or other internal components of the faucet for repair or replacement.
Troubleshooting Common Issues

The removal of bathroom faucet handles can be a straightforward task, but there may be instances where you encounter difficulties. Here’s a discussion of common issues that may arise and how to address them:
It’s important to note that if you are not comfortable working with plumbing fixtures, it is always advisable to seek the assistance of a qualified plumber.
Stuck or Stripped Screws or Nuts
- If the screws or nuts holding the handle in place are stuck or stripped, you can try using a penetrating lubricant to loosen them up. Apply the lubricant to the screws or nuts and allow it to sit for a few minutes before attempting to remove them.
- If the screws or nuts are stripped, you may need to use a pair of pliers or a screw extractor to remove them.
Handles Glued or Welded in Place
- If the handles are glued or welded in place, you will need to use a heat gun or a soldering iron to remove them. Be careful not to damage the faucet or the surrounding area when using these tools.
- Once the glue or solder has been softened, you should be able to remove the handles by hand or with a pair of pliers.
Broken or Damaged Handles
- If the handles are broken or damaged, you will need to replace them. You can find replacement handles at most hardware stores or online.
- When replacing the handles, be sure to use the correct size and type of handles for your faucet.
